MPA19-13801
Follow the steps below to find the right door for your dog or cat. Have multiple pets who will use the door? Choose a door sized for your largest pet.
Checklist before Installation
Before cutting any holes or installing your pet door, make sure that:
Installation Step 1: Determine the Pet Door Location
Installation Step 2: Prepare the Door
Installation Step 3: Cut the Pet Door Opening
Installation Step 4: Install the Pet Door
| Screw Length | Cut-Out Thickness | Trimming Instructions |
| 88 mm screw | 4 – 25 mm | Trim screw to door thickness + 56 mm |
| 88 mm screw | 25 – 38 mm | No trimming needed |
| 100 mm screw | 38 – 51 mm | No trimming needed |
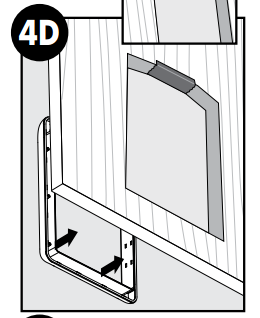
 Apply duct tape along the top interior and exterior edge of the cut-out. Leave about 5 cm uncovered on either side of the tape and make sure no excess tape will show outside the frame. This is to cover the raw edge of the cut-out to keep it from pinching or cutting the motion sensor wire.
Installation Step 5: Insert the Screws and Plugs
Checklist before Installing
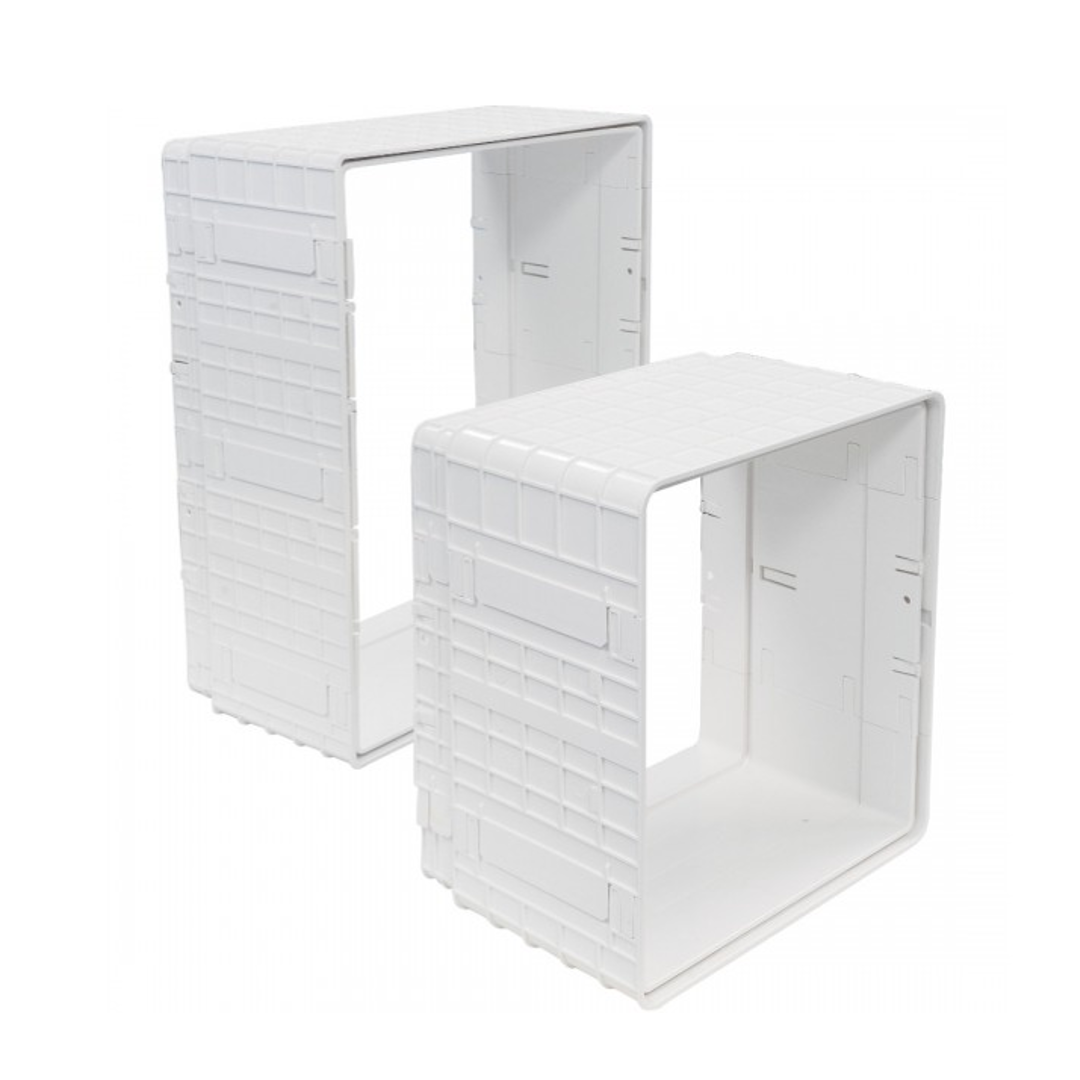
Step 1: Assemble the Tunnels
Step 2: Determine the Pet Door Location
Step 3: Prepare the Wall
Step 4: Cut the Pet Door Opening
Step 5: Install the Pet Door
Passport™ Wall Entry Kit Tunnel Frame Guide
| Minimum Wall Thickness | Maximum Wall Thickness | Tunnel Frames Needed | Tunnel Position |
| 95 mm | 130 mm | Interior only (A-B) | Interior Tunnel in Inner Tunnel Slot |
| 130 mm | 149 mm | Interior only (A-B) | Interior Tunnel in Outer Tunnel Slot |
| 149 mm | 265 mm | Interior (A-B) and Exterior (C-D) |
Interior and Exterior Tunnel in Inner Tunnel Slot |
| 265 mm | 284 mm | Interior (A-B) and Exterior (C-D) |
Interior Tunnel in Outer Tunnel Slot, Exterior Tunnel in Inner Tunnel Slot |
| 284 mm | 305 mm | Interior (A-B) and Exterior (C-D) |
Interior Tunnel and Exterior Tunnel in Outer Tunnel Slot |
 Apply duct tape along the top edge of the interior and exterior cut-out. Leave approximately 5 cm uncovered on either side of the tape and make sure no excess tape will show outside the pet door frame. This is to cover the raw edge of the cut-out to keep it from pinching or cutting the motion sensor wire. With the motion sensor wire on top of the tunnel, place the interior pet door frame in the interior side of the cut-out. If you’re working alone, tape the interior frame in place while installing the exterior frame and installation hardware.
The Passport™ Pet Door fits in most standard doors and walls 2.5 - 5 cm thick. You can purchase the Passport™ Wall Entry Kit for walls or doors 9 cm - 30.5 cm thick. The Wall Entry Kit frames out the wall cut-out, giving your door installation a clean, smooth, finished look. You can purchase a Passport™ Wall Entry Kit online or from our Customer Care Centre (currently only available in Canada and Europe).
Close
![]() +44 (0) 118 963 9924
+44 (0) 118 963 9924
Monday to Friday 08:30 - 17:00 GMT
Need help with your product?
Customer service is at the heart of everything we do. We’re committed to giving you expert advice to ensure you always receive the very best.
© 2025 Radio Systems Corporation All Rights Reserved. * Registered in the U.S. Patent and Trademark Office. Privacy Statement Cookies Policy
